How To Clean The Ionizer Needles Inside An Air Purifier?
Your air purifier works hard every day. It pulls in dirty air and pushes out clean air. But there is a hidden part that needs your attention too.
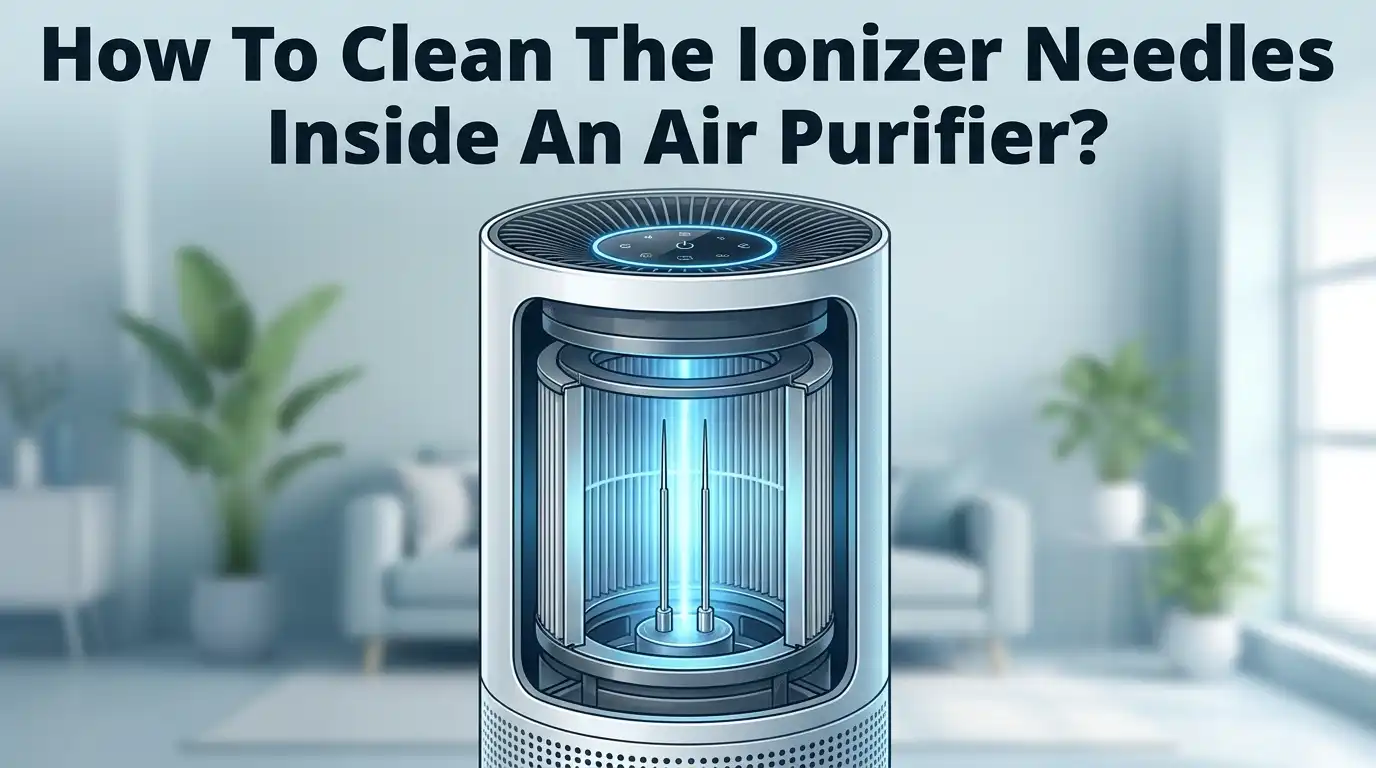
Ionizer needles sit inside many air purifiers. They release charged ions into the air. These ions help trap dust and allergens.
Over time, these needles collect dust and grime. This buildup makes them less effective. Your air purifier then struggles to do its job well.
The good news? Cleaning ionizer needles is simple and quick. You only need about 15 minutes and a few basic tools.
In a Nutshell
- Turn off and unplug the unit first. This step keeps you safe from any electrical shock.
- Open the purifier carefully to reach the needles or plates inside. Most units have a simple latch or panel.
- Wipe gently with a dry cloth. If dust sticks, use a slightly damp cloth instead.
- Brush away debris with a soft bristled brush. This tool removes buildup without bending the needles.
- Avoid pressure or twisting. Needles are thin and bend easily, so a light touch works best.
- Clean the exterior with a microfiber cloth to finish the job.
What Are Ionizer Needles and Why They Need Cleaning
Ionizer needles are thin metal pins or plates inside your air purifier. They release negatively charged ions into the air. These ions attach to dust particles and allergens, making them heavier so they fall out of the air you breathe.
Over time, dust and particles stick to the needles themselves. This buildup reduces how well the ionizer works. Dirty needles cannot release ions effectively, so your air quality suffers. The needles become less efficient at cleaning your indoor air.
Regular cleaning keeps your ionizer working at full strength. When needles stay clean, they continue releasing ions properly. This means better air quality in your home or office. Clean needles also help your air purifier last longer overall.
You should clean ionizer needles periodically as part of routine maintenance. Dust accumulation happens gradually, so you might not notice the problem right away. By the time you see visible dust on the needles, they may have already lost some effectiveness.
Cleaning needles is different from cleaning other air purifier parts. HEPA filters need gentle washing with water. Ionizer needles require a dry approach instead. Water can damage the electrical components that create the ions.
The good news is that maintaining ionizer needles takes minimal effort. A quick 15 minute cleaning session keeps everything working properly. You do not need special tools or expensive cleaners. Simple household items like soft cloths and brushes work perfectly.
Neglecting needle maintenance leads to reduced air purification. Your unit has to work harder to achieve the same results. This extra strain can shorten your air purifier’s lifespan. Regular cleaning prevents these problems from developing.
Tools and Supplies You’ll Need
Before you start cleaning, gather the right supplies. You don’t need many items, and most people already have them at home.
A dry microfiber cloth is your main tool. This cloth removes dust without scratching the delicate needles. Microfiber works better than regular paper towels because it traps particles instead of pushing them around.
Keep a soft bristled brush nearby. A brush with gentle bristles lifts stubborn dust from tight spaces. Toothbrushes work well for this job. Avoid stiff brushes that can bend or damage the needles.
A vacuum with a brush attachment helps remove large dust pieces first. This step prevents you from pushing debris deeper into the machine. The brush attachment is gentler than the regular vacuum hose.
Have a slightly damp cloth ready as backup. Use this only if your dry cloth doesn’t remove stubborn grime. Dampen it with plain water only. Never use cleaning solutions or chemicals near ionizer needles.
Wear safety glasses to protect your eyes from flying dust particles. This simple precaution keeps debris out of your face during cleaning.
Keep a flashlight or headlamp handy. Ionizer needles sit deep inside the purifier. Good lighting helps you see exactly what you’re cleaning. You’ll spot missed dust spots easily.
Finally, have a small container nearby to hold screws or parts you remove. This prevents losing small components while the machine is open.
That’s it. These basic supplies cost nothing if you already own them. You’re ready to clean your ionizer needles safely and effectively.
Safety Precautions Before You Begin
Before you touch any part of your air purifier, safety comes first. Power down your unit completely and unplug it from the wall outlet. This single step prevents electrical shocks and keeps you safe while working inside the machine.
Never attempt to clean ionizer needles while the purifier runs. Even if the needles seem harmless, electricity flows through them during operation. Unplugging removes all power and eliminates risk.
Wear safety glasses or eye protection throughout the cleaning process. Dust particles become airborne when you brush or wipe the needles. These tiny pieces can irritate your eyes or scratch the surface. Glasses keep your eyes safe and comfortable.
Allow the unit to cool for a few minutes after unplugging. Some air purifiers generate heat during normal use. Waiting ensures you won’t accidentally burn your hands on warm interior components.
Work in a well lit area. Use a flashlight or headlamp to see inside the purifier clearly. Good lighting helps you spot all the needles and avoid missing spots.
Handle the needles with extreme care. These metal points are sharp and fragile. Never grip them tightly, bend them, or apply pressure. Damaged needles cannot ionize air effectively, which reduces your purifier’s performance.
Lay out all your cleaning supplies before you open the purifier. Gather your dry cloth, soft brush, and vacuum attachment in one spot. Having everything ready keeps you organized and speeds up the process.
Remove any loose jewelry or long sleeves that might catch on sharp needle edges. Tie back long hair to prevent it from getting tangled inside the machine.
Take your time and work slowly. Rushing leads to accidents and mistakes that damage your equipment.
Step-By-Step Guide To Cleaning Ionizer Needles
Start by locating the ionizer needles inside your air purifier. They appear as thin metal pins or flat plates, usually positioned near the air intake or in a designated ionizer chamber. Use your flashlight to get a clear view of their exact location and condition.
Gently remove any large dust buildup first. Use your vacuum with the brush attachment to pull away loose particles from around the needles. Keep the vacuum at a safe distance to avoid touching the delicate metal points directly.
Next, take your soft bristled brush and carefully sweep away remaining dust from the needle surfaces. Use light, gentle strokes moving in one direction. Never press hard or twist the brush against the needles, as this causes permanent damage to the metal tips.
Wipe the needles with your dry microfiber cloth. This is your primary cleaning method. Simply drape the cloth near the needles and let it collect dust particles. A dry cloth works best because it avoids moisture problems.
For stubborn dust that won’t come off easily, slightly dampen your backup cloth with water. Gently dab the needle areas without applying pressure. Moisture should be minimal—just enough to help loosen stuck particles.
Work systematically across all visible needles to ensure complete coverage. Take your time and avoid rushing through this step.
Finally, inspect your work with the flashlight. Look for any remaining dust or debris clinging to the metal surfaces. If you spot missed areas, repeat the gentle wiping process until the needles appear clean and shiny.
Let everything air dry completely before reassembling your purifier and plugging it back in.
How To Clean the Exterior and Surrounding Components
The exterior of your air purifier needs attention just like the interior components. Dust settles on the outside casing and can affect how well the machine operates overall.
Start by wiping down the outer surface with a dry microfiber cloth. Use gentle circular motions to remove dust from the casing, vents, and any textured areas. Pay special attention to air intake openings where dust accumulates easily.
Check the power cord for any dust buildup. Wipe it down carefully to keep it clean and safe. Look at the base or stand where the purifier sits. Dust often gathers in these spots and can restrict airflow from underneath.
If your air purifier has a display screen or control panel, use a slightly damp cloth to clean these areas. Make sure no water drips into any openings or buttons. Dry the screen immediately after wiping to prevent moisture damage.
Examine any vents or grilles on the sides and back of the unit. These areas trap dust particles. Use your soft bristled brush to gently sweep away debris from grille patterns and slats.
Don’t forget the filter housing area where you insert or remove filters. Wipe around the edges and seams where dust likes to hide. This prevents particles from entering the clean air chamber.
Check underneath the purifier for dust accumulation on feet or wheels. A quick wipe keeps the base clean and helps the unit sit properly on your floor.
Regular exterior cleaning prevents dust from entering the interior and keeps your air purifier looking fresh. This simple maintenance step takes just a few minutes but makes a real difference in your machine’s performance and lifespan.
Common Mistakes To Avoid During Cleaning
Cleaning ionizer needles requires care, but mistakes can damage your air purifier or reduce its effectiveness. Understanding what to avoid helps you maintain your unit safely.
Never clean while the purifier is powered on. Always unplug the machine first. Electricity and moisture create serious safety hazards. Wait a few minutes after unplugging so internal components cool down completely.
Excessive moisture is a common problem. Water can damage electrical components inside the purifier and create rust on metal needles. Use a dry cloth as your main cleaning tool. Only slightly dampen your cloth for stubborn dust, and never spray water directly onto the needles.
Applying too much pressure damages the delicate needle tips. These metal points are thin and fragile. Avoid twisting, bending, or scrubbing hard against them. Instead, use gentle wiping motions and let your soft brush do light sweeping work.
Skipping regular maintenance leads to buildup that becomes harder to remove. Dust accumulation reduces your purifier’s performance over time. Clean your ionizer needles on a consistent schedule so particles don’t harden or stick to the surfaces.
Don’t ignore the areas around your needles. Dust in surrounding components affects air quality and makes deep cleaning more difficult later. Wipe nearby surfaces and vents during your maintenance routine.
Forgetting to inspect your work leaves missed spots. Use a flashlight to check all needle surfaces after cleaning. This ensures you’ve removed all visible dust and debris.
Finally, avoid using harsh chemicals or abrasive materials. These damage needle coatings and internal parts. Stick to dry cloths, soft brushes, and plain water when needed. Simple tools work best for ionizer maintenance.
How Often Should You Clean Ionizer Needles
Your ionizer needles need regular attention to work properly. The exact cleaning schedule depends on your air quality and how much you use your purifier.
Check your needles every two weeks. This helps you spot dust buildup before it becomes a problem. If you live in a dusty area or have pets, you may need to clean more frequently. People in cleaner environments might stretch it to monthly cleanings.
A good rule is simple: clean whenever you notice visible dust on the needles. Don’t wait for performance to drop. Dust buildup blocks the ionization process and reduces effectiveness.
Most users find a monthly deep clean works well. This means removing the unit and thoroughly wiping all needle surfaces. Between deep cleans, do quick visual checks weekly to catch heavy dust accumulation early.
Your filter replacement schedule also matters. When you change your main filter, that’s a perfect time to inspect and clean the ionizer needles too. This creates a natural maintenance routine.
Air quality in your home affects cleaning frequency significantly. High pollution areas, smoking households, or homes with multiple pets need more frequent attention. Allergy sufferers may benefit from more regular cleaning to maintain peak performance.
Pay attention to how your purifier sounds and smells. Reduced airflow or strange odors mean it’s time to clean. Trust these signs over a strict calendar schedule.
Start with monthly cleaning and adjust based on results. Keep a simple log of when you clean. This helps you find the right rhythm for your specific situation. Consistent maintenance prevents problems and keeps your ionizer working efficiently.
Troubleshooting: Signs Your Ionizer Needs Attention
Your ionizer needs attention when it shows specific warning signs. Reduced air output is one of the first indicators. If your purifier runs but pushes less air through your home, dust likely blocks the needles.
Listen for unusual sounds coming from your machine. A rattling or buzzing noise often means dust has settled on the ionizer plates. Your purifier may also emit a burnt smell, which signals that dust is accumulating on the charged needles.
Check your air quality results if your purifier has a sensor. When the air quality reading stays high even after running for hours, the ionizer probably needs cleaning. The needles cannot ionize particles effectively when covered in dust.
Visual inspection is your best tool. Open your purifier and look directly at the needles. If you see a gray or brown film coating the metal, cleaning time has arrived. Thick dust buildup appears as clumps on the needle tips.
Pay attention to how your allergies respond. If dust symptoms return or worsen, your ionizer may be working poorly. A failing ionizer allows more particles to circulate in your space.
Your purifier’s performance light might change color. Many machines show a red or orange indicator when filters need attention, though this sometimes applies to ionizer condition too.
Don’t wait for major problems. Catching these signs early makes cleaning easier and faster. Regular inspection prevents dust from hardening on the needles, which requires more aggressive cleaning methods. Simple weekly glances at your ionizer help you maintain peak performance and keep your air truly clean.
Final Thoughts
Cleaning your ionizer needles doesn’t have to be hard. With a few simple steps, you can keep your air purifier running like new.
Remember to always unplug your unit first. This one habit protects you and the delicate needles inside.
A dry or slightly damp cloth works for most cleaning jobs. Save the deeper cleaning for a soft bristled brush when dust builds up.
Patience matters more than speed here. Rushing through the process often leads to bent or damaged needles.
Take your time and wipe gently. The needles are thin and can break if you press too hard.
Set a simple reminder on your phone or calendar. Regular checks every two weeks help you catch problems early.
Small consistent efforts beat occasional deep cleans. Your purifier will thank you with better air quality and quieter operation.
Think about your home’s specific needs too. Pet owners and people with allergies might need more frequent cleaning sessions.
Watch for warning signs like unusual noises or reduced airflow. These signals tell you it’s time for attention.
A clean ionizer means cleaner air for your family. This simple task protects your investment and your health.
Don’t overlook this part of your regular home maintenance routine. It takes just minutes but makes a real difference.
Your air purifier works hard every day. Give it the care it deserves through regular needle cleaning.
Start today if you haven’t checked your needles recently. Your lungs and your machine will both benefit from the effort.
Simple steps, done consistently, keep your air purifier working at its best for years to come.
Frequently Asked Questions
What tools do I actually need to clean ionizer needles?
You need just a few basic items. A microfiber cloth works best for wiping needles without scratching them. A soft-bristled brush helps remove stubborn dust particles gently. A vacuum with a brush attachment removes large debris quickly. That’s really all you need. Most people have these items at home already.
Can I use water when cleaning the needles?
A dry cloth is your best choice. Water can damage the electrical components inside your purifier. If dust sticks stubbornly, you can use a slightly damp cloth. Keep moisture minimal. Never soak the needles or spray them directly. Wring out any excess water from your cloth before touching the needles.
What happens if I press too hard on the needles?
Ionizer needles bend and break easily. Pressing hard or twisting damages them permanently. Your purifier stops working properly if needles break. Always use gentle, light pressure when wiping. Let the cloth do the work without forcing it. Think of the needles as fragile and delicate.
How long does a full cleaning session take?
Plan for about 15 minutes total. This includes unplugging the unit, opening it safely, and wiping all needle surfaces. Take your time. Rushing leads to mistakes. Most people finish in one sitting without any trouble.
Should I clean the exterior too?
Yes, the outside matters. Dust on the exterior case affects airflow. Use a microfiber cloth on the outside casing. Wipe vents and air intake areas gently. This prevents dust from entering the machine again.

I’m Maya Brown, the voice behind Pure Breeze Vault. I write detailed, honest, and easy-to-follow air purifier reviews to help readers compare features, understand filter technologies, and choose products with confidence. My goal is to make research simpler, clearer, and more practical for anyone improving indoor air quality at home.