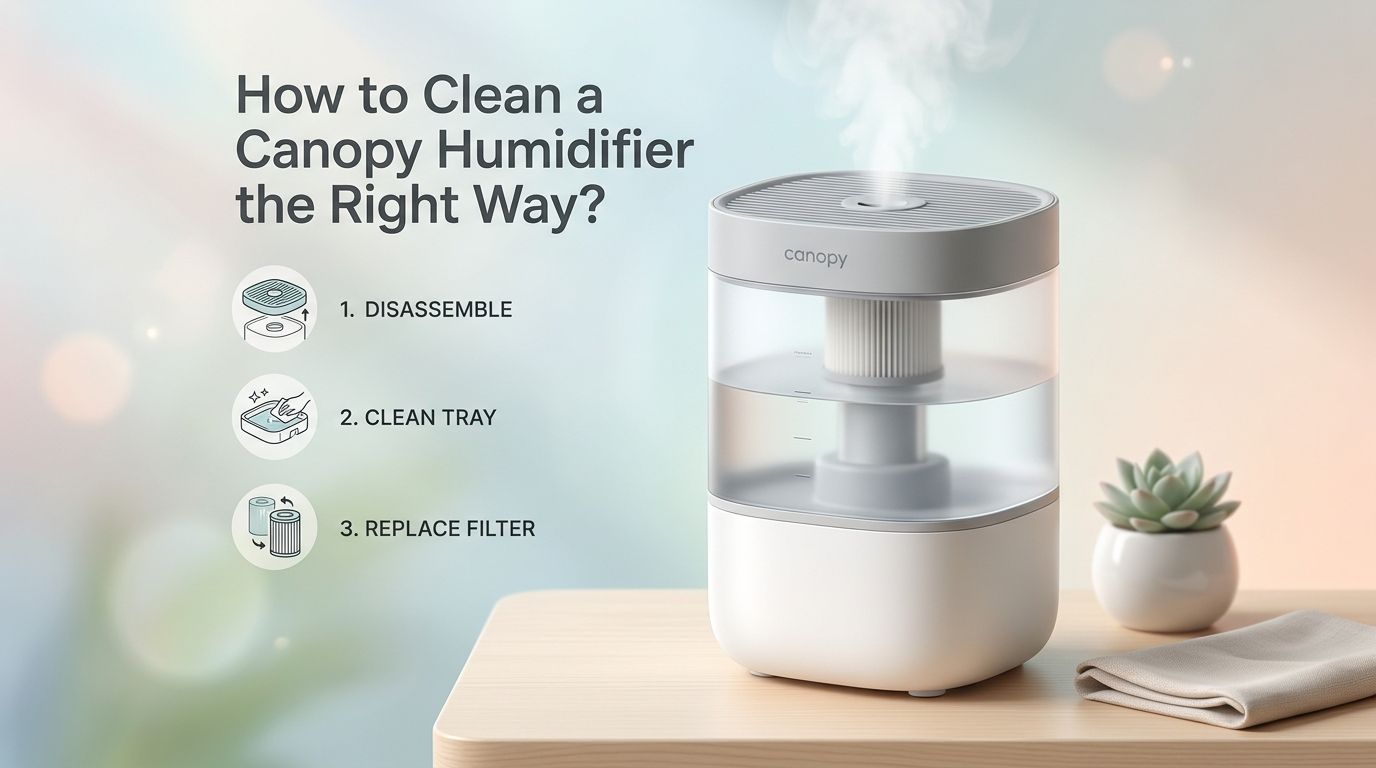
How to Clean a Canopy Humidifier the Right Way?
A dirty humidifier can do more harm than good. Instead of fresh, hydrated air, it can push mold spores, bacteria, and mineral dust straight into your lungs. If you own a Canopy humidifier, you already chose a device built for easy maintenance. But easy does not mean optional.
Many Canopy owners assume the device stays clean on its own. That is a mistake. Mineral scale builds up inside the tank. A pink or slimy film can form near the water sensors.
The filter collects deposits that reduce output over time. Left unchecked, these issues affect air quality and shorten the life of your humidifier.
Key Takeaways
- Clean your Canopy humidifier at least once per week. The EPA recommends cleaning portable humidifiers every three days during daily use. A weekly deep clean is the minimum standard to prevent bacteria and mold growth inside the unit.
- Most water touching parts are dishwasher safe. The tank, cap, tray, grill, and spacer can all go on the top rack of your dishwasher. Use the normal or light duty cycle only. Do not wash these parts alongside greasy dishes or with harsh detergents.
- Never put the main body or the paper filter in the dishwasher. The main body holds the electrical components and the fan motor. The paper filter will break down in the dishwasher. Wipe the main body with a damp cloth or antibacterial wipe instead.
- White vinegar is your best friend for mineral deposits. A mixture of half vinegar and half water breaks down calcium and lime scale inside the tank. Let it soak for 30 minutes, scrub, and rinse thoroughly with clean water.
- Replace the filter on schedule. Canopy recommends replacing the disposable filter every 45 days with regular use. A clogged or crusty filter reduces humidity output and can trap bacteria.
- Always dry every part completely before reassembling. Moisture trapped between components creates the perfect environment for mold. Let all parts air dry on a clean towel before putting the humidifier back together.
How to Disassemble Your Canopy Humidifier for Cleaning
Start by unplugging the unit from the power source. Never clean any electrical device while it is still connected to power. Remove the tank from the base by lifting it straight up.
Next, remove the grill by pressing down on the back edge, away from the power buttons. This releases the clip. Lift the grill off gently. To remove the spacer, press the tabs on either side and lift upward. The tray sits beneath the spacer and lifts out easily.
You now have five separate pieces that touch water: the tank, the cap, the tray, the spacer, and the grill. The paper filter sits in the tray and should be set aside. The main body with the fan and motor stays on the counter. This full disassembly takes less than one minute once you know the order.
How to Clean Canopy Humidifier Parts in the Dishwasher
The dishwasher method is the fastest way to clean your Canopy humidifier. Place the tank, cap, tray, spacer, and grill on the top rack only. The bottom rack exposes parts to more intense heat and water pressure, which can warp or damage them.
Select the normal or light duty cycle. Avoid heavy duty or sanitize cycles. Do not add extra detergent beyond what you normally use, and skip any rinse agents that leave chemical residue. Do not wash humidifier parts with dirty pots, pans, or plates coated in food grease.
Pros of the dishwasher method: It saves time, kills most bacteria through heat exposure, and removes light mineral film with minimal effort. Cons: It may not remove heavy mineral scale or stubborn buildup, and repeated high heat cycles could eventually degrade plastic over many months.
How to Deep Clean the Water Tank with Vinegar
For a thorough clean, the vinegar soak method works best. Pour half a cup of white vinegar and half a cup of water into the tank. Secure the cap, then shake the tank vigorously for 15 to 20 seconds. This distributes the vinegar solution across all interior surfaces.
Set the tank down and let it sit for at least 30 minutes. The acetic acid in vinegar dissolves calcium, lime, and other mineral deposits left behind by tap water. After soaking, use a soft brush or sponge to scrub any visible buildup inside the tank.
Rinse the tank several times with clean water until the vinegar smell is gone. Inspect the interior for remaining spots. Repeat the soak if needed. This method is safe, affordable, and avoids harsh chemical cleaners.
Pros of vinegar cleaning: It is natural, inexpensive, and very effective against mineral scale. Cons: It requires a 30 minute wait time, and the smell can linger if you do not rinse well enough.
How to Clean the Main Body and Water Sensors Safely
The main body of your Canopy humidifier contains the fan, motor, and electrical wiring. This part must never be submerged in water or placed in the dishwasher. Doing so will damage the unit and void any warranty.
Wipe the exterior and interior surfaces of the main body with a damp cloth or antibacterial wipe. Pay special attention to the water sensing probes on the bottom of the unit. These small metal pins detect water levels and can accumulate mineral scale over time.
If you see white or chalky buildup on the probes, dampen a cloth with a small amount of vinegar and gently rub the deposits away. Dry the probes with a clean towel. Scale on these sensors can cause the humidifier to misread water levels and stop working properly.
How to Clean and Maintain the Canopy Humidifier Filter
The Canopy humidifier uses a disposable paper filter that sits inside the tray. This filter traps impurities and helps prevent mold from entering the moisture output. You should not put this filter in the dishwasher because it will fall apart.
To extend filter life between replacements, you can soak the filter in a 50/50 vinegar and water solution for about 30 minutes. This dissolves mineral deposits that clog the paper fibers. Rinse the filter gently under running water and let it dry flat before placing it back in the tray.
Replace the filter every 45 days with regular use. A dirty or clogged filter reduces the humidifier’s ability to produce moisture. If you notice reduced output, a musty smell, or visible discoloration, replace the filter right away rather than attempting to clean it again.
Pros of filter soaking: Extends filter life and saves money on replacements. Cons: Paper filters degrade with each cleaning, and soaking cannot fully restore a heavily used filter.
How to Remove Stubborn Mineral Buildup from Your Canopy Humidifier
If vinegar alone does not remove hard mineral scale, you can increase the soaking time to several hours or even overnight. Fill the affected part with undiluted white vinegar and let it sit. The longer soak breaks down tougher deposits.
Use a soft bristle brush or old toothbrush to scrub the loosened buildup. Avoid metal scrapers, steel wool, or abrasive pads. These will scratch the plastic surfaces and create grooves where bacteria can hide.
For the water tank specifically, some owners fill it with warm water and add two tablespoons of citric acid powder as an alternative to vinegar. Citric acid is a strong mineral dissolver and rinses away cleanly. Whichever method you choose, always rinse every part at least two to three times with fresh water before reassembling.
How to Prevent Mold Growth Inside Your Canopy Humidifier
Mold thrives in warm, damp, dark spaces. A humidifier ticks all three boxes if you leave standing water in it. Empty the water tank every day if you are not using the unit. Stagnant water becomes a breeding ground for bacteria and mold within 48 hours.
Place your humidifier on a clean, flat surface away from dusty shelves or carpeted areas. Dust and debris pulled into the fan can mix with moisture and promote mold. Wipe down the area around the humidifier regularly.
Use distilled water instead of tap water whenever possible. Distilled water contains no minerals, which means less scale buildup and fewer nutrients for mold to feed on. This single change dramatically reduces how often you need to deep clean the unit.
Pros of distilled water: Eliminates mineral deposits and reduces mold risk. Cons: It costs more than tap water and requires regular trips to the store or a home distiller.
How to Know When Your Canopy Humidifier Needs Cleaning
Several clear signs tell you the humidifier needs attention. A pink or orange film inside the tank indicates bacterial growth. A slimy texture on any water touching surface means biofilm has formed. Both require immediate cleaning.
Reduced moisture output is another signal. If the room feels drier than usual despite running the humidifier, mineral buildup on the filter or inside the tank is likely restricting airflow and water absorption.
A musty or stale odor coming from the unit is the most obvious warning. This smell means bacteria or mold spores are being pushed into your air. Stop using the humidifier immediately, deep clean all parts, and replace the filter before turning it back on.
How to Set Up a Weekly Cleaning Routine for Your Canopy Humidifier
Consistency prevents problems. Pick one day each week as your humidifier cleaning day. Sunday works well because you can prep the unit for a fresh week of use.
Start by disassembling all removable parts. Place the dishwasher safe components on the top rack and run a normal cycle. While the dishwasher runs, wipe down the main body and clean the water sensors. Inspect the filter and decide if it needs a vinegar soak or a full replacement.
Once the dishwasher cycle finishes, let every part air dry completely on a clean towel. Do not reassemble the humidifier while any piece is still damp. Trapped moisture between components is the number one cause of mold in otherwise clean humidifiers. A full weekly routine takes about 10 minutes of active effort plus drying time.
How to Clean a Canopy Large Room or Portable Humidifier
The Canopy Large Room model follows the same cleaning steps as the Bedside unit. The main difference is the larger tank size, which requires more vinegar solution for a full soak. Use a full cup of vinegar mixed with a full cup of water for the bigger tank.
The Portable Canopy humidifier has a smaller, simpler design. Wipe the bottom of the unit (where electrical components are stored) with a damp rag or antibacterial wipe. The upper parts that touch water are still dishwasher safe and follow the same top rack rules.
For both models, the filter type and replacement schedule remain the same. The cleaning principles are identical across the entire Canopy lineup. Size is the only real variable, and it only affects how much cleaning solution you need.
How to Avoid Common Mistakes When Cleaning Your Canopy Humidifier
The most common mistake is putting the main body in the dishwasher. This destroys the electrical system. Always keep the motor housing dry and wipe it by hand only.
Another frequent error is reassembling the unit before all parts are dry. Even a few drops of water trapped under the spacer or grill can grow mold within days. Patience during drying is essential.
Some owners use bleach or harsh chemical cleaners inside the tank. While a very diluted bleach solution can disinfect in emergencies, white vinegar is safer and equally effective for regular maintenance. Chemical residue from strong cleaners can become airborne when the humidifier runs, which irritates lungs and airways.
Finally, do not ignore the filter. A filter that has been used for three months will not clean effectively, no matter how much vinegar you use. Stick to the 45 day replacement schedule for best results.
How to Reassemble Your Canopy Humidifier After Cleaning
Once every part is completely dry, start reassembly from the bottom up. Place the clean, dry filter flat inside the tray. Make sure it sits fully flat with no gaps or folds at the edges. Air gaps around the filter reduce efficiency and allow unfiltered air to pass through.
Set the tray into the main body. Attach the spacer by aligning the tabs and pressing down until it clicks. Place the grill on top by lining up the front edge and pressing the back until it snaps into place.
Fill the tank with fresh, clean water (distilled if possible) and place it onto the base. Plug in the unit and select your preferred fan speed. Your Canopy humidifier is now clean, reassembled, and ready to deliver fresh moisture. A good clean makes an immediate difference in output quality and room comfort.
Frequently Asked Questions
How often should you clean a Canopy humidifier?
Clean your Canopy humidifier at least once per week if you use it daily. The EPA suggests a deep clean every three days for any portable humidifier in regular use. A weekly dishwasher cycle combined with a daily water change is a solid baseline routine for most homes.
Can you put all Canopy humidifier parts in the dishwasher?
No. Only the parts that touch water are dishwasher safe. These include the tank, cap, tray, spacer, and grill. The main body and the paper filter must never go in the dishwasher. The main body contains electrical components, and the paper filter will disintegrate in a wash cycle.
What is the best solution for cleaning a Canopy humidifier tank?
White vinegar mixed with equal parts water is the most effective and safest cleaning solution. Let it soak in the tank for 30 minutes, scrub, and rinse thoroughly. For heavy mineral deposits, use undiluted vinegar and soak for several hours or overnight.
How do you prevent pink mold in a Canopy humidifier?
Pink mold forms from a bacteria called Serratia marcescens. Prevent it by emptying the tank daily, using distilled water, and cleaning all water touching parts at least once a week. Replace the filter every 45 days and always let parts dry fully before reassembling.
How long do Canopy humidifier filters last?
Canopy recommends replacing the disposable paper filter every 45 days with regular use. If you use tap water with high mineral content, the filter may clog faster. You can extend filter life slightly by soaking it in a vinegar and water solution, but eventually the paper degrades and needs replacement.
Can you use bleach to clean a Canopy humidifier?
A very dilute bleach solution (one teaspoon per gallon of water) can disinfect in an emergency. However, white vinegar is the preferred cleaning agent for regular use. Bleach residue can become airborne and irritate your respiratory system. If you use bleach, rinse all parts at least three to four times with clean water afterward.

I’m Maya Brown, the voice behind Pure Breeze Vault. I write detailed, honest, and easy-to-follow air purifier reviews to help readers compare features, understand filter technologies, and choose products with confidence. My goal is to make research simpler, clearer, and more practical for anyone improving indoor air quality at home.