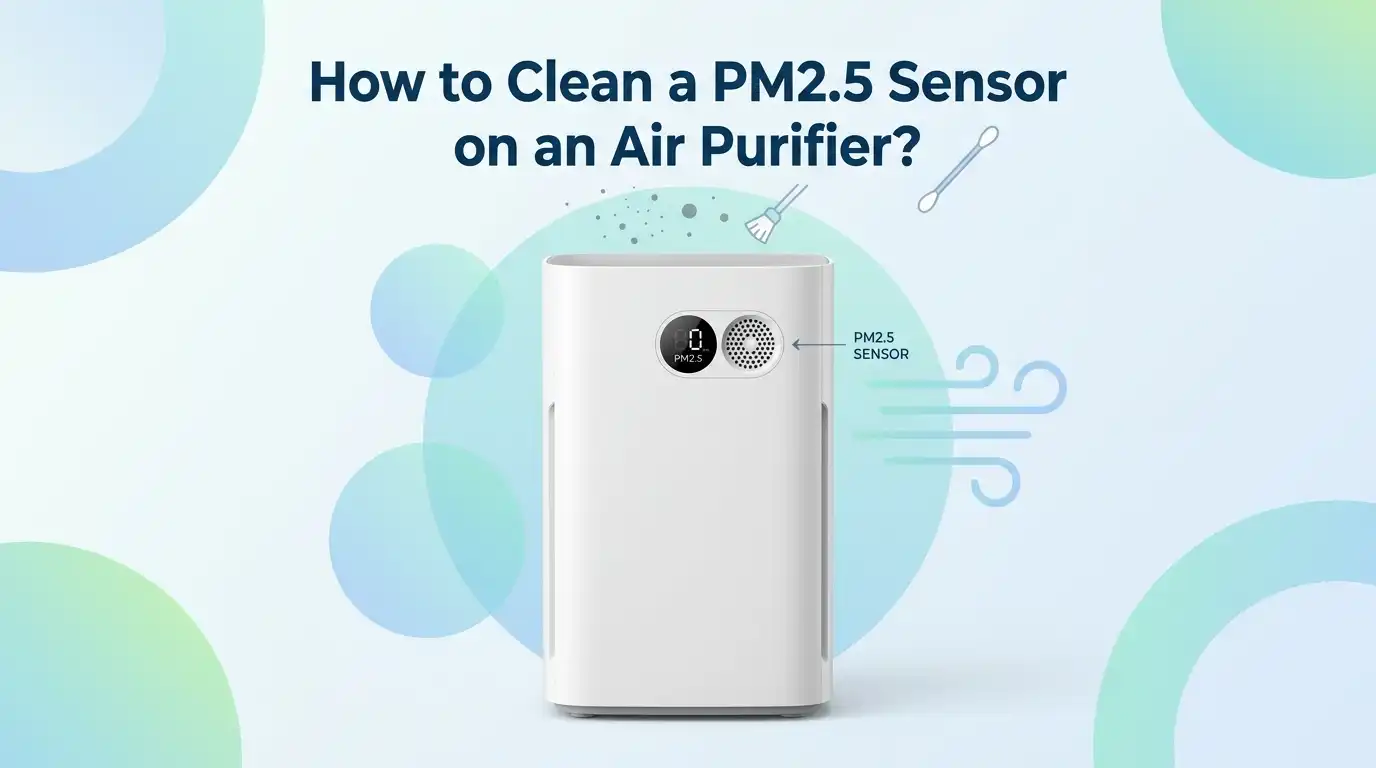
How to Clean a PM2.5 Sensor on an Air Purifier?
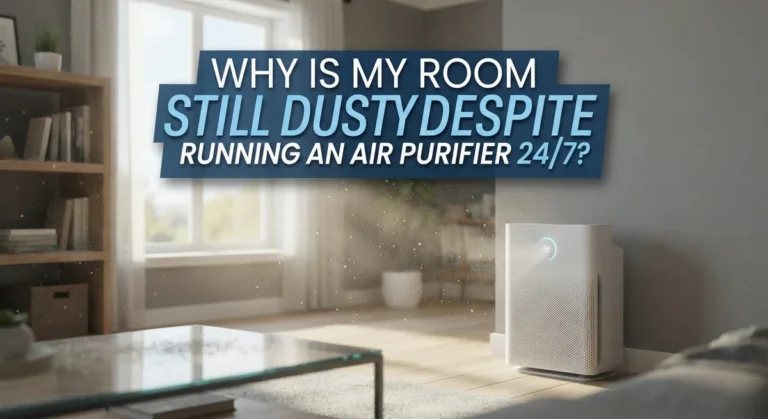
If your air purifier keeps showing strange numbers, stays red for too long, or runs hard in a room that already feels clean, the PM2.5 sensor may be dirty. This is a common problem.
Dust can collect on the sensor lens, around the sensor vents, or behind the little cover that protects the sensor area. When that happens, the purifier may read the air the wrong way.
The good news is that this job is usually simple. You do not need special skills. You just need the right steps, a gentle hand, and a few basic tools. In this guide, you will learn exactly what to do, what to avoid, and how to check if the cleaning worked.
Key Takeaways
- A dirty PM2.5 sensor can make a good air purifier act badly. It can show false pollution levels, keep the fan too high, or stop Auto mode from working well. If your purifier seems jumpy or stuck, the sensor is one of the first things to check.
- Always unplug the purifier before you clean anything. This protects you and the machine. It also stops the fan from pulling fresh dust into the sensor area while you work. Safety first makes the whole job easier.
- There is no single cleaning method for every purifier. Some models do best with a dry cotton swab. Some allow a slightly damp swab on the sensor lens, followed by a dry swab. Start gentle and check your manual if you still have it.
- Do not flood the sensor with water, spray cleaners, or strong air blasts. These can scratch the lens, push dust deeper inside, or damage the electronics. A soft touch is better than a strong one.
- Cleaning the sensor cover and nearby vents matters too. Many people clean only the visible lens and forget the openings around it. Dust around the inlet and outlet can also cause bad readings, so clean the full area.
- If cleaning does not fix the issue, look at other causes. A clogged filter, bad placement near steam or cooking smoke, a stuck reset, or a failing sensor can also create false readings. Cleaning is the first fix, not the only fix.
Why the PM2.5 Sensor Matters
The PM2.5 sensor is the part of the purifier that reads tiny particles in the air. These particles can come from smoke, cooking, dust, candles, and outdoor pollution.
The purifier uses that reading to decide how hard it should work, especially in Auto mode. If the sensor is dirty, the machine can make bad choices.
A clean sensor helps the purifier react faster and more accurately. That means the fan can speed up when pollution rises and calm down when the air gets better. This saves energy and noise, and it also helps the room feel more comfortable.
Some purifiers show PM2.5 as a number. Others use a color light or a simple air quality scale. In either case, the reading depends on a sensor that must stay clean. If the sensor cannot see the air clearly, the display cannot guide you well.
Common Signs the Sensor Is Dirty
The first clue is often a reading that does not match the room. Maybe the purifier shows high pollution even after it has run for a long time. Maybe it stays on one color for hours. Maybe the fan keeps racing in a room that feels calm and dust free. These are common signs.
Another clue is strange behavior after normal use. For example, the purifier may jump to a high setting every time you turn it on, then refuse to settle down. It may also stay on a low setting during real pollution, like while cooking. Both patterns can point to a dirty or blocked sensor.
You may also notice that Auto mode feels unreliable. One day it reacts fast. The next day it seems sleepy or overly sensitive. That inconsistency matters. The sensor lens may have dust on it, or the vent openings around the sensor may be clogged. A simple cleaning often fixes this.
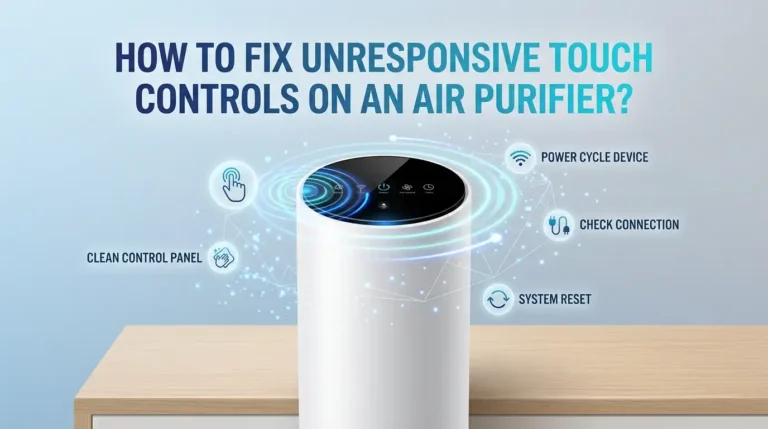
Safety Steps Before You Start
Before you touch the sensor, turn the purifier off and unplug it. This is the first step every time. You do not want the fan pulling dust while you work. You also do not want moisture or a cotton swab near powered electronics.
Move the purifier to a bright area so you can see the sensor cover and the openings around it. A table with good light is better than a dark corner. If the purifier has been running, give it a few minutes to settle. That helps loose dust stop moving around inside.
Wash your hands or use clean gloves. You want the sensor area to stay clean. Do not use rough cloths, metal tools, or pointed objects. Gentle cleaning is the rule here. If you cannot see the sensor clearly, use your phone light or a small flashlight instead of poking around blindly.
Tools You Need for a Safe Cleaning Job
Most people already have the tools they need at home. Start with clean cotton swabs, a dry microfiber cloth, and a soft brush or vacuum with a gentle brush attachment. These are enough for many sensor cleanings. Keep everything clean so you do not move dirt from one surface to another.
If your purifier manual allows it, you may also use a slightly damp cotton swab with plain water for the sensor lens. The swab should feel barely moist, not wet. You should also keep a dry cotton swab nearby to remove any leftover moisture right away.
Pros: These tools are cheap, easy to find, and safe for light cleaning. Cons: They can still cause trouble if you press too hard or use too much water. Avoid spray cleaners, glass cleaners, soap, and strong canned air unless your purifier maker clearly says those are safe for your model.
Method One Use a Dry Cotton Swab
This is the safest starting method for most air purifiers. Open the sensor cover if your unit has one. Then use a clean, dry cotton swab to gently wipe the lens or sensor opening. Twist the swab lightly as you clean. Let the cotton do the work. Do not scrub.
Use a fresh swab if the first one picks up visible dust. If there is dust around the sensor opening, clean that area too. Work slowly and keep the swab straight. A light touch is better than repeated hard pressure. The goal is to lift dust away, not force it deeper inside.
Pros: This method is simple, low risk, and good for regular upkeep. It is the best first move if you are not sure what your model allows. Cons: It may not remove sticky grime or oily film. If dry cleaning does not clear the problem, a slightly damp method may help more.
Method Two Use a Slightly Damp Cotton Swab
Some sensor lenses collect more than dry dust. They can pick up a thin film from smoke, cooking oil, or indoor grime. In that case, a slightly damp cotton swab can help. Wet one end with plain water, then squeeze out extra moisture. The tip should be barely damp.
Wipe the lens gently with the damp end. Right after that, use the dry end of the same swab or a fresh dry swab to remove all moisture. Do not leave the lens wet. If your purifier has narrow sensor openings, keep the swab movements short and controlled.
Pros: This method can remove film that a dry swab leaves behind. It often works well when the sensor looks clean but still behaves badly. Cons: It carries more risk if you use too much water. Never drip water into the sensor area. If you feel unsure, stop and go back to dry cleaning only.
Method Three Clean the Sensor Vents and Cover
Many sensor problems come from the area around the sensor, not just the lens itself. Dust can collect on the sensor cover, the small air inlet, and the air outlet near the sensor. If those passages clog, the purifier may struggle to sample room air correctly. That leads to poor readings.
Use a soft brush, a dry cloth, or a vacuum with a gentle brush attachment to clean the outside of the sensor cover and the nearby openings. If the cover comes off, clean both sides before you put it back. Move slowly so you do not knock dust into the sensor chamber.
Pros: This method helps airflow around the sensor and removes the dust many people miss. It is a smart step when the lens is clean but the readings still look wrong. Cons: A strong vacuum or rough brush can be too aggressive. Use only gentle suction and soft contact.
How to Dry the Sensor and Put Everything Back
After cleaning, check the sensor area closely. If you used only dry tools, you can reassemble right away. If you used a slightly damp swab, make sure the lens and nearby parts are fully dry first. A dry cotton swab is useful for a final pass.
Snap the sensor cover back into place if you removed it. Make sure it sits flat and secure. If the cover is loose, dust can enter more easily later. Also check that no cotton fibers are left behind. Even a tiny strand can confuse the sensor or block airflow.
This step sounds simple, but it matters. Poor reassembly can undo a good cleaning job. Take one extra minute here. Once the cover is back on and everything looks dry and clean, place the purifier back where you use it and get ready to test the readings.
How to Test the Sensor After Cleaning
Plug the purifier back in and turn it on. Let it run for several minutes in the same room where you noticed the problem. Watch the PM2.5 number, color light, or Auto mode fan response. The reading should now change more naturally with the room conditions.
A good basic test is to let the purifier run in calm air first. Then create a small, safe change in air quality, like opening a window to outdoor air for a short time or walking near the unit after dusting another surface far away. You are checking for a normal response, not trying to overwhelm the room.
If the purifier reacts and then settles down, that is a good sign. The sensor is likely reading better now. If nothing changes at all, or if the reading stays frozen, the issue may be deeper than dust on the sensor. That is when you move on to troubleshooting.
Common Mistakes That Cause Bad Readings
One common mistake is using too much force. People assume more pressure means better cleaning. It does not. A sensor lens can scratch easily, and that can make readings worse instead of better. Always clean with a light hand and slow movement.
Another mistake is using the wrong liquid. Glass cleaner, alcohol, soap, and strong cleaning sprays can leave residue or harm the sensor area. Plain water is the safest choice if your model allows any moisture at all. Never spray liquid directly into the purifier.
Placement can also confuse the sensor. This matters more than many people think. If the purifier sits near cooking steam, a humidifier, candles, or an open window, the reading may look wild even after a good cleaning. A clogged main filter can also reduce airflow and make the purifier act strangely.
How Often You Should Clean the Sensor
There is no perfect schedule for every home, but a regular check helps a lot. In many homes, a sensor check every two months is a smart plan. In cleaner spaces, every few months may be enough. In dusty homes, homes with pets, or homes near traffic, you may need to inspect it more often.
Do not wait only for bad readings. Build sensor care into your normal purifier routine. Check the prefilter, wipe the exterior, and look at the sensor area at the same time. Small routine care is easier than a full fix later. It also helps Auto mode stay useful.
A good rule is simple. If the purifier suddenly becomes too noisy, too lazy, or too dramatic, inspect the sensor. Your machine often tells you what it needs. Frequent cooking, smoke, renovations, and heavy dust are strong reasons to shorten your cleaning schedule.
When Cleaning Does Not Solve the Problem
If you clean the sensor and the purifier still gives odd readings, do not assume the cleaning failed. The problem may come from another part of the unit. Start with the filter. If the filter is packed with dust, airflow can drop and the purifier can behave badly even with a clean sensor.
Next, think about location. If the purifier sits near a kitchen, bathroom door, humidifier, or a drafty window, the sensor may react to real local changes that do not reflect the whole room. Move it to a more open spot and test again. Good placement supports better sensing.
If nothing improves, the sensor itself may be failing. Some sensors wear out, get damaged, or drift over time. In that case, cleaning will not fully fix the issue. Check your manual, contact the maker, or ask about service if the reading stays frozen, extreme, or clearly false for days.
FAQs
Can I use alcohol to clean the PM2.5 sensor?
It is better to avoid alcohol unless your purifier maker clearly says it is safe. Many sensors do best with a dry cotton swab or a slightly damp swab with plain water. Alcohol can leave residue, damage delicate parts, or create more risk than benefit.
A soft, careful method is usually enough. If dry cleaning does not work, try the gentle damp swab method only if your model allows it. Less is better in the sensor area.
Why does my purifier still show red after I clean the sensor?
A red light does not always mean the sensor is still dirty. The room may have real pollution from cooking, smoke, candles, pet activity, or outdoor air entering from windows. Let the purifier run for a while in a calm room before you judge the result.
If the red light stays on in clearly clean air, check the filter, the sensor cover, and the purifier location. A clogged filter or poor placement can also cause bad behavior.
Can I use compressed air on the sensor?
Strong compressed air is risky. It can push dust deeper inside, move moisture, or stress delicate parts. A gentle vacuum with a brush attachment on the outside area is usually safer. A cotton swab gives you better control near the lens.
If your manual does not clearly approve compressed air, skip it. Control matters more than force when you clean a sensor.
How do I know if the sensor is damaged and not just dirty?
If the reading stays frozen, jumps for no clear reason, or remains far from reality after careful cleaning and filter checks, the sensor may be damaged. Another sign is a purifier that never responds properly in Auto mode even after you clean it and move it to a better location.
At that point, the issue is likely beyond simple maintenance. Service or replacement advice from the maker may be the next step.
Is it enough to clean only the filter and ignore the sensor?
No. The filter and the sensor do different jobs. The filter captures particles. The sensor reads particles. A clean filter helps airflow, but a dirty sensor can still report the air badly. That means the purifier may run at the wrong speed even with a fresh filter.
For the best result, clean both on a regular schedule. Good airflow and good sensing work together.

I’m Maya Brown, the voice behind Pure Breeze Vault. I write detailed, honest, and easy-to-follow air purifier reviews to help readers compare features, understand filter technologies, and choose products with confidence. My goal is to make research simpler, clearer, and more practical for anyone improving indoor air quality at home.